Click on any image to view a high resolution version of the thumbnail.
What do we need to replace the bearings?
- A two arm puller (OTC 1025)
- A Press (or equivalent)
- New Bearings - Nachi 6203LL and Nachi 6201LL from Lynne at Accurate Bearing 1-800-323-6548 (Don't call on Mondays)
- A mallet
- A Bearing Splitter (OTC 1122)
- An assortment of bolts
- A 5/16" long socket
- A #2 Phillips Head Screwdriver
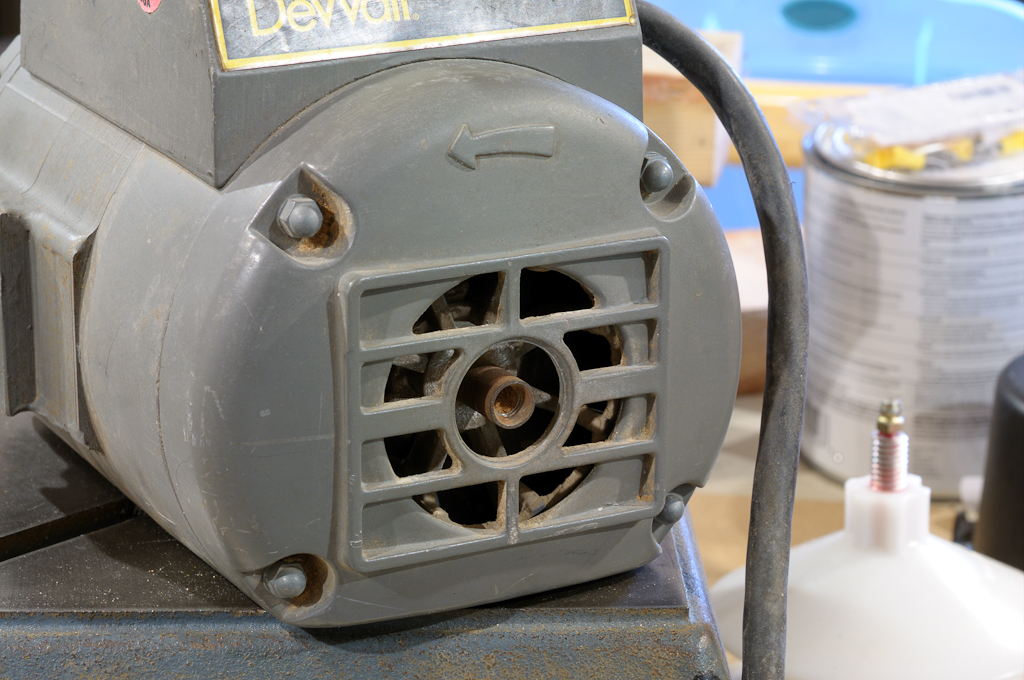
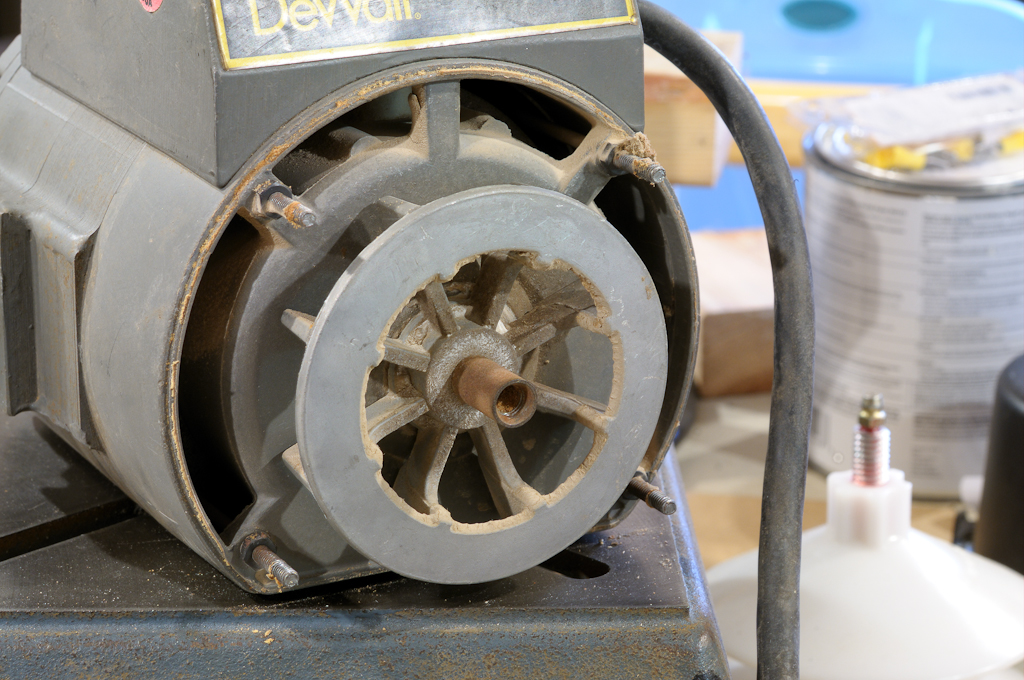
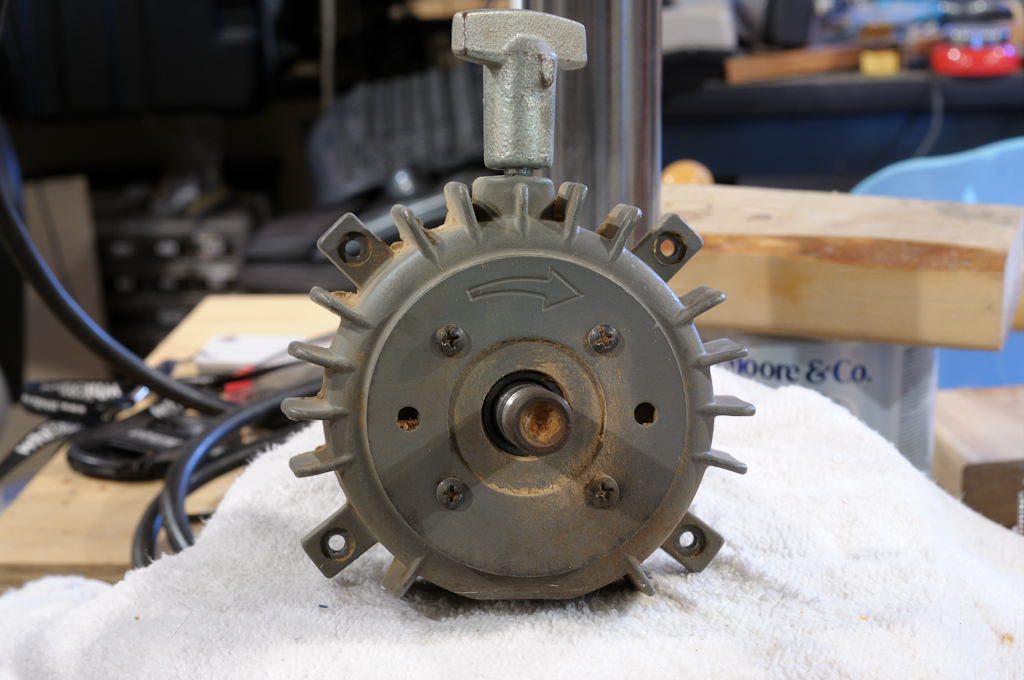
With the cover removed we can see the fan clearly as well as the 5/16" nuts and lock washers holding the rear end bell in place.
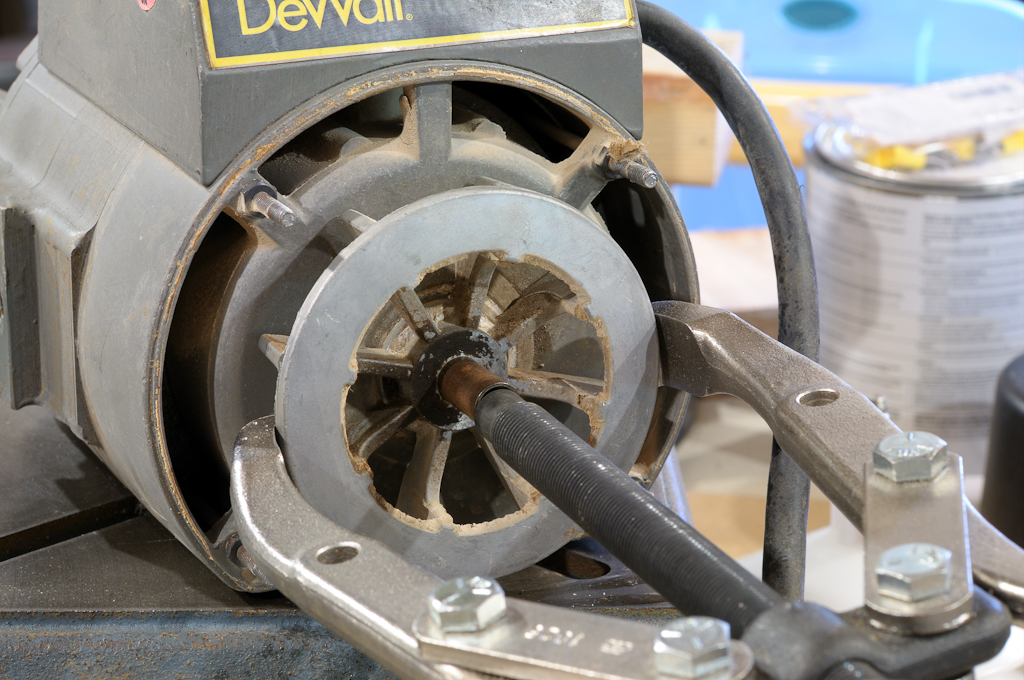
Use a puller to remove the fan. In these pictures you can see quite a bit of rust on the rear arbor and it was a mistake not to remove it first. If the arbor is clean then the fan should be a lot easier to remove. It is extremely important that you keep the fan as symmetrical as possible while pulling it. I can't stress this enough. In this picture you can see that threaded part of the puller is larger than the diameter of the arbor. I used a bolt with the right diameter and pushed on that instead of the arbor to finish the pull.
Assuming the fan is balanced you want to take advantage of this fact. Mark the arbor and the fan so you can put it back exactly the way it came off. Once the fan is removed unbolt the nuts from the tie rods. Use a soft mallet to tap on the rear arbor and dislodge the rear bearing while pushing the rotor toward the front of the motor.
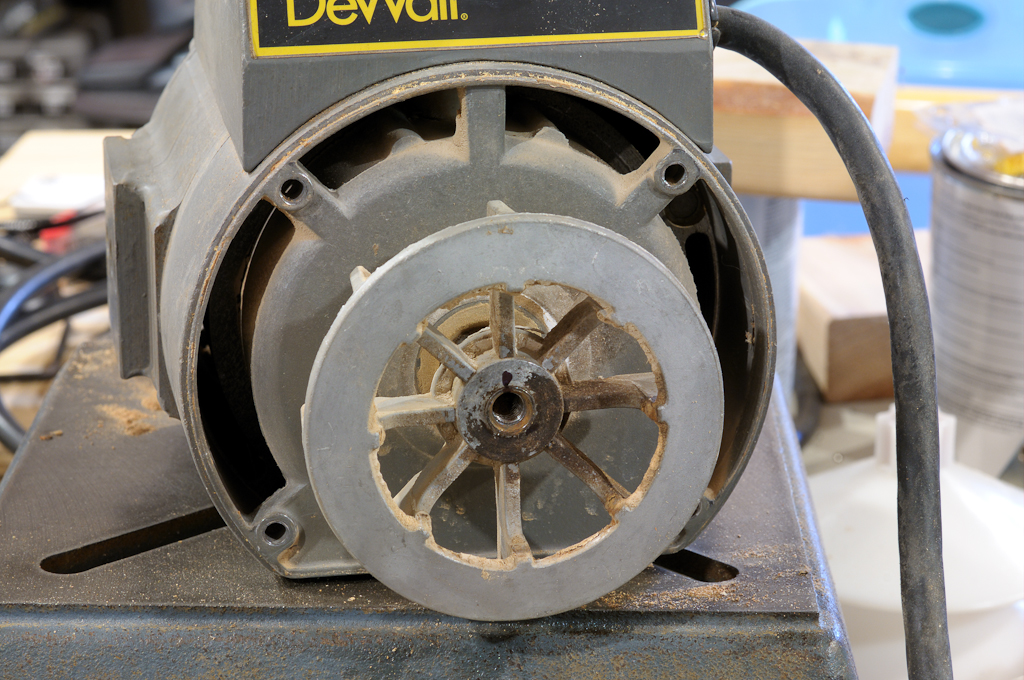
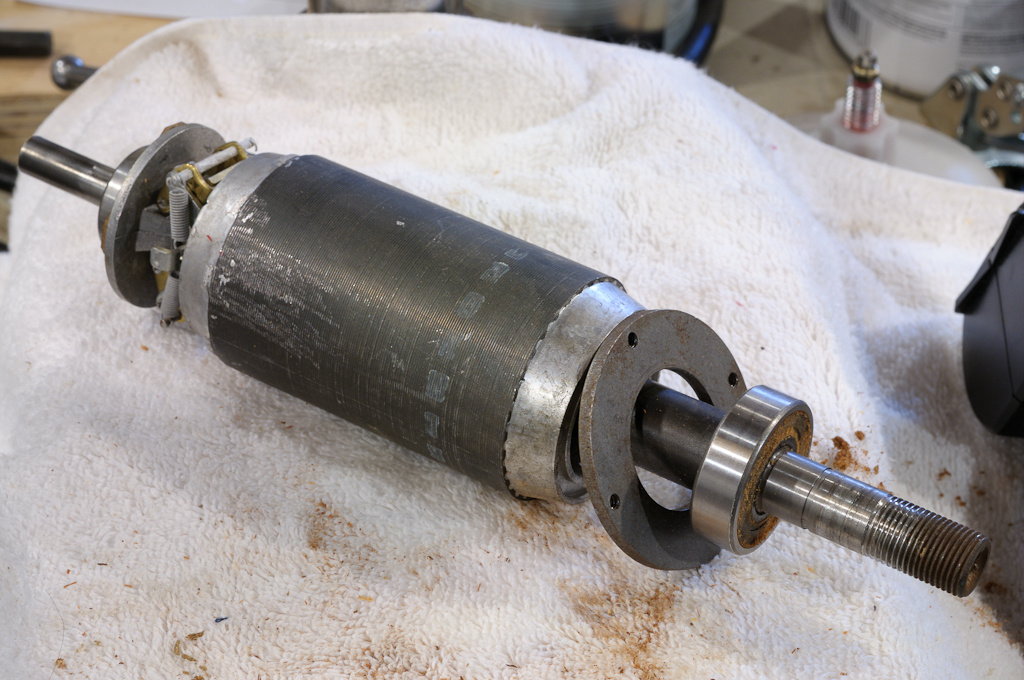
GENTLY remove the rotor assembly front the motor (now is not the time to scrape the windings!) Once removed we can see the rear bearing still on the rotor as well as get a clear view of the centrifugal brake mechanism. IMPORTANT - There is a spring washer in the rear end bell that needs to sit between the bell and the bearing. Make sure you keep track of it for re-assembly. It is critical for a clean fit and quiet motor.

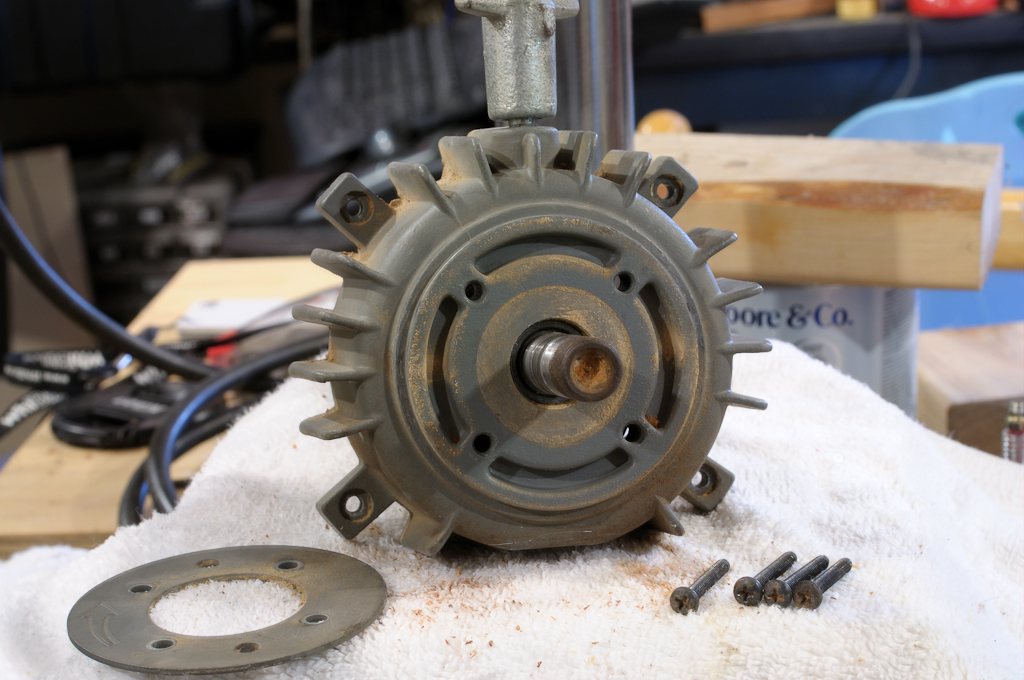
Next we will remove the screws holding the bearing retainers in place. I have read several accounts of folks removing this retainer and then firing up their motor. This will destroy the motor 99% of the time. In fact a local motor shop did this to a frame 245 that I brought in for them to work on. I am devoting the rest of my life to making sure that shop goes out of business as soon as possible ;-)
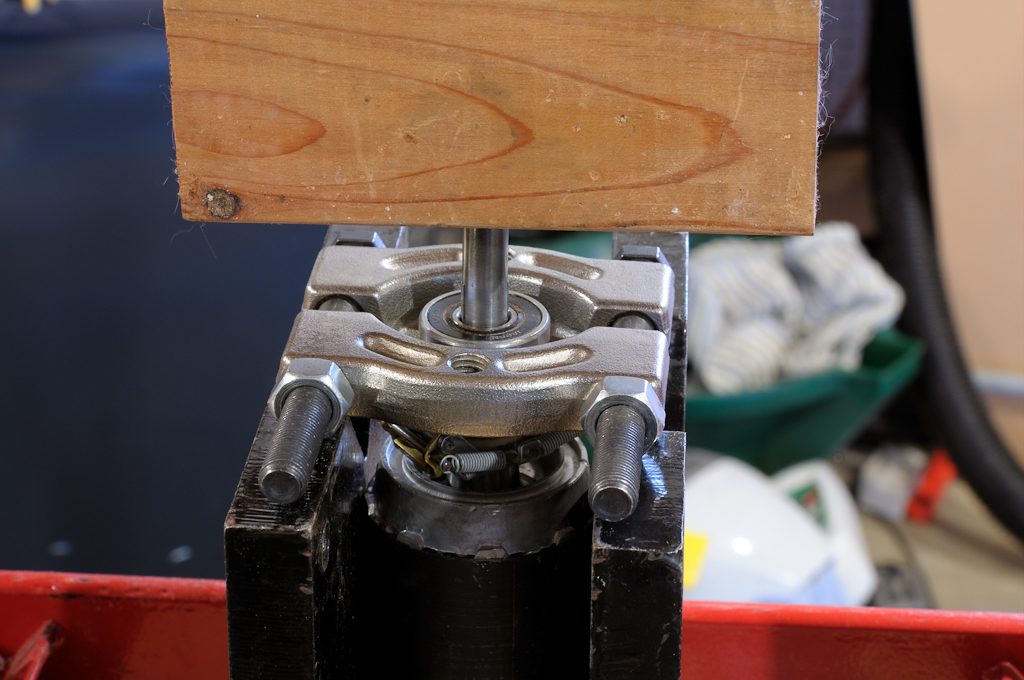
With the screws removed we can set aside the outer retainer and move on to taking the front end bell off.
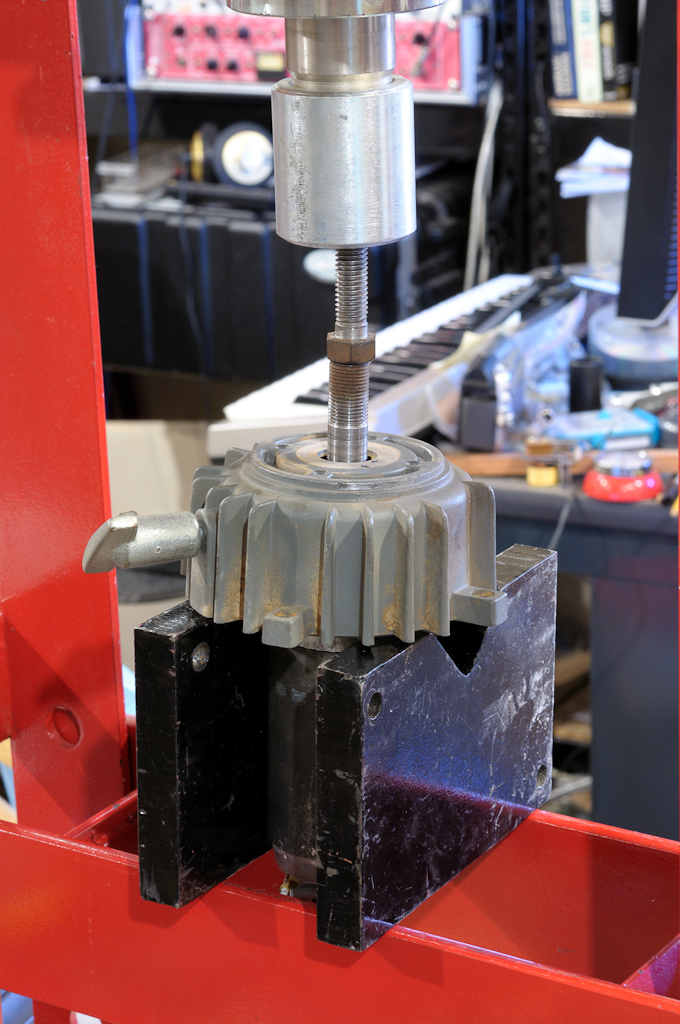
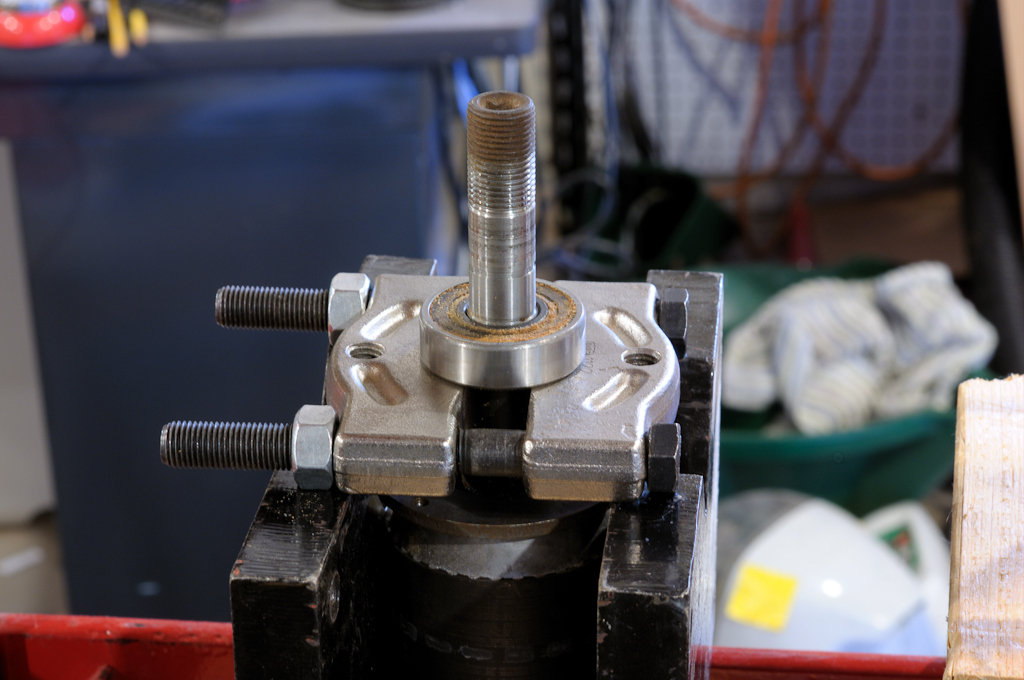
Simply press down on the arbor while making sure the front end bell is sufficiently supported and everything can move freely. Nice and slow... again you can see I used a large bolt to span the space between the press and the arbor. It's good to have an assortment of these handy. The press always seems to be too far or too close to the item needing to be pressed.
Now the rotor is free and we can see the inner bearing retainer clearly.
Use the bearing splitter to press the rear bearing off. It is a bit tricky to get in between the brake and the bearing but the OTC 1122 is a very good fit. Again, nice and slow. It really doesn't take that much pressure. It is very important that the splitter not be too tight. It can easily shear off metal if anything binds and you aren't paying close attention (I speak from experience).
Do the same for the front bearing (hear the splitter is in the correct orientation because I had enough room).
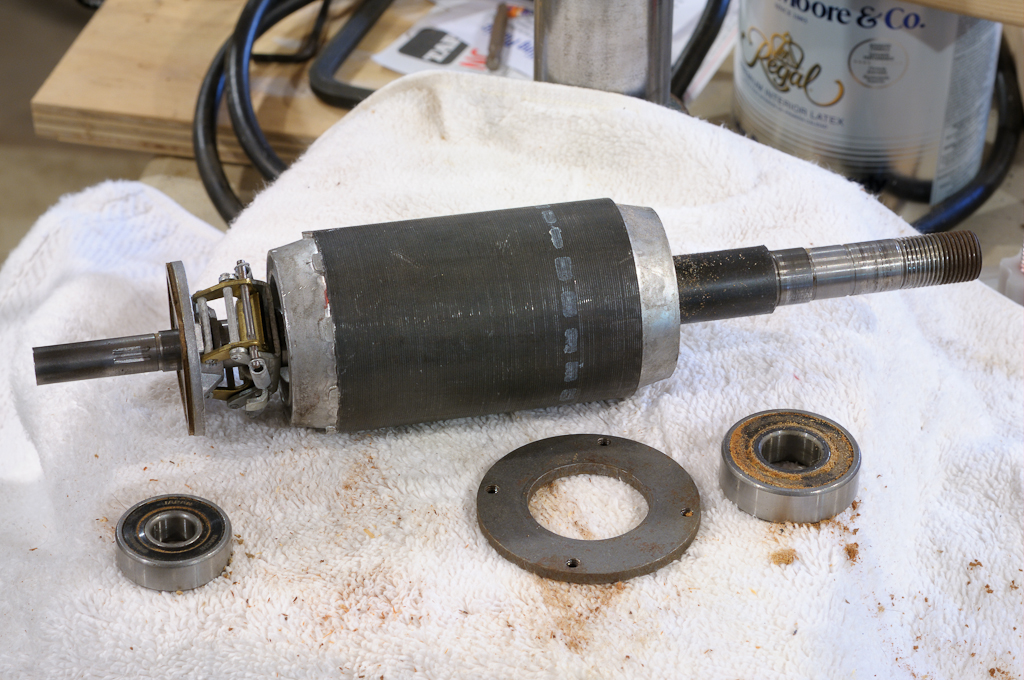
Everything is all apart. Take care with the brake mechanism. The "pads" usually need to be roughed up slightly with some fine grit (220) sand paper. Just enough to take the glaze off.
I didn't take pictures of the re-assembly because I was a bit rushed but it is an exact reversal of the disassembly process. I found the key was to press the rotor assembly with the front bell into the rear bell before bolting things together with the tie rods. It took me a few tries so trust me on this one. I did not press the smaller bearing all the way onto the shoulder but rather left it about 1-2mm off the shoulder. This ensured a nice tight fit for everything and yielded a very smooth and quiet motor.
Originally I attempted to use the tied rods to pull the motor back together and this did not work well at all. I think there's a major lesson here so I'd be very interested if anyone else knows why this yielded so much better results. This may be the reason I struggled so hard with my frame 196 for the last year.
What I don't show here is that I also cleaned everything really well, blew out the sawdust from the motor, wire wheeled a lot of the rusted parts and generally got things ship shape.This motor had seen little use so the arbor threads are in great shape as is the mechanical brake. Take a look at the results (note the grandfather clock as a reference for relative quietness):
I'm really not sure what it says about ME that ... I thought that little clip was SO cool !!!!
ReplyDeleteAfter I put the motor back together, on my MBF, I spent an unjustifiable amount of time just listening to it hum :-)
Incidentally, you MAY want to turn your attention toward that *#@(& clock. That sucker is LOUD ;-)